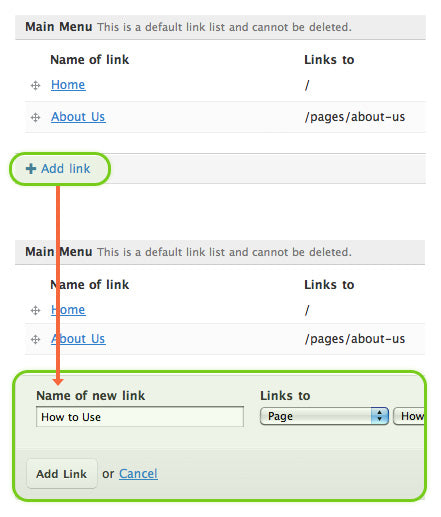
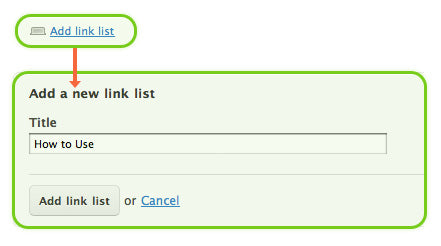
Adding drop down menus to the theme's main menu is super-straightforward. If you're a little more familiar with Shopify: all you're doing is creating a link in the Main Menu and a Link List with the same name. The theme will match them up and do all the magic needed to create the drop down.
Before starting, you should create the pages you intend to use in your menu, if you haven't already. Do so by visiting the Blogs & Pages tab in the admin panel. With your pages created, you're ready to begin:
- In the store admin panel, click on the Navigation tab.
- Create an item in the Main Menu. Let's call it "How to Use".

- Click on the Add link list link, located just below Shop Navigation at the top of the page. The name of this Link List must match the name you entered previously, in this case it will say "How to Use" again. All of the items contained within this link list will show up when you hover over the link in the Main Menu.

- There is now a link in the Main Menu and a link list, both named "How to Use".
- Scroll down to the newly created "How to Use" link list and add links.
- Visit your shop, hopefully everything went smoothly.
Note that that if the name of the link in your Main Menu changes, the drop down menu will no longer work. To fix this situation, you will need to edit your Link List's handle. For instance, if I was to rename my Main Menu link to "Fun Summer Ideas", the handle for my "How to Use" Link List would need to become "fun-summer-ideas". I would likely also want to change the title of my Link List to "Fun Summer Ideas".


